| Line 24: | Line 24: | ||
After that, I framed out and installed the AC in the window, plugged up all the holes with great stuff, and lined it with Reflectix like the rest of the walls. I then wired up a new breaker in my breaker box, ran it under the house (absolutely horrible place), out the back of the house through 1" conduit, into the garage, and wired up four new plugs in the garage (only one in the cooler itself - been needing better power out there for some time). And finally, I put a couple of pieces of the foam board on the walls just to see how it was going to work. Turns out there is just no way I can compress the insulation behind the foam board all the way down to the 2x2 etensions I added. So I pushed the board as square as I could and nailed into place leaving about another 1.5" gap. The insulation is pretty much taking up all that room but the back of the foam board is lined in foil and it says dead spaces is OK. | After that, I framed out and installed the AC in the window, plugged up all the holes with great stuff, and lined it with Reflectix like the rest of the walls. I then wired up a new breaker in my breaker box, ran it under the house (absolutely horrible place), out the back of the house through 1" conduit, into the garage, and wired up four new plugs in the garage (only one in the cooler itself - been needing better power out there for some time). And finally, I put a couple of pieces of the foam board on the walls just to see how it was going to work. Turns out there is just no way I can compress the insulation behind the foam board all the way down to the 2x2 etensions I added. So I pushed the board as square as I could and nailed into place leaving about another 1.5" gap. The insulation is pretty much taking up all that room but the back of the foam board is lined in foil and it says dead spaces is OK. | ||
[[Image:Progress_13-1-.jpg]] | [[Image:Progress_13-1-.jpg]] | ||
| + | |||
| + | Made some progress today but also took a step back. I hadn't put the front of the AC back on and something fell into the fan while testing - shattering it into a million pieces. Damnit. I have no idea what it was as there is no way I was putting stuff in there. I'll find out when I take it all back apart... | ||
| + | I framed out the final wall and installed the door. The perspective in this first photo is a little hard to follow. It was taken from outside the utility room looking through the door. The wall for the cooler is on about a 30 degree angle. | ||
| + | [[Image:Progress_14-1-.jpg]] | ||
| + | |||
| + | And finally, the ceiling after insulation. Once the walls are fully lined with foam board, I will line the ceiling from the inside with it as well. | ||
| + | [[Image:Progress_17-1-.jpg]] | ||
| + | |||
| + | |||
| + | I haven't had much time to work on the cooler this week but have made some progress. I was hoping by this point to be able to cool the area while I worked but no such luck since I shattered the AC's fan blade. Hopefully the replacement will be here this weekend. Anyhow, I have all the framing done as well as the wall insulation wrapped up. Now its down to installing all the foam board. | ||
| + | Here is a photo of the cooler looking into the utility room. We'll put some trim around it to finish it off once everything else is complete. I'm hoping to make serious progress by this weekend and be ready to finish it up as soon as the replacement fan arrives. | ||
| + | [[Image:Progress_18-1-.jpg]] | ||
| + | |||
| + | Got all the walls finished today. Now it is down to the ceiling, floor, and the door... should go pretty quick over the next few evenings. Still debating what wallboard to use to finish off the inside but will have that settled in the next few days. What I really want is $30 a sheet... and I need eight sheets - whew. Regardless of the wallboard, I am in hopes to start testing later this week. | ||
| + | [[Image:Progress_19-1-.jpg]] | ||
| + | |||
| + | Got the ceiling finished. Its lined with three layers of foam insulation. On top of the ceiling was exactly enough room to pack the R30 insulation on its side - six pieces across. No photos as its really more the same at this point. Plan on doing the floor tomorrow night... | ||
| + | I tested it down to 60 degrees for about 30 minutes. I didn't pay that close of attention but the temperature dropped from 84 to 60 within 10~15 minutes and the AC never came back on until after I opened the door. Can't wait to test it once the floor and door are fully insulated. | ||
| + | |||
| + | Got the floor finished up tonight... ended up laying six layers of the foam insulation. Pretty much came out flush with the bottom of the doorway. Scroll back to post #75 for the before shot of the floor and doorjam to get a feel for how thick it turned out to be. Here is a photo of the floor now: | ||
| + | [[Image:Progress_21-1-.jpg]] | ||
| + | |||
| + | |||
| + | After a few days away from the project, I'm back on it. I put 1/2" MDF on the floor and started placing the wall board. The plastic wall board I chose is EXPENSIVE at $30 a sheet (I needed 7 sheets) but it is going to look really good once finished. | ||
| + | Here is a photo of the floor. A layer of the plastic wall board will go on top of this to finish it off. | ||
| + | [[Image:Progress_22-1-.jpg]] | ||
| + | [[Image:Progress_23-1-.jpg]] | ||
Revision as of 15:35, 14 March 2007
This article is taken form a thread on www.homebrewtalk.com by John Beere http://www.homebrewtalk.com/showthread.php?t=11440
So I've started my latest project - a walk-in cooler. It will be roughly 5' X 5' X 7' and will be located in our utility closet / laundry room in the garage and take up slightly more than half of the room. I am going to insulate the walls with R30 insulation (the heaviest I can find) and then 2 layers of this insulated foam board I found at Lowes which is 2" thick and listed as R15. I've picked out a frigidare 12k BTU window AC combined with a Ranco controller to cool it. My goal is to keep the entire cooler between 35 and 37 degrees year round.
I am also considering creating a fermentation cooler that is external to the cooler but is fed cold air on demand from a hole in the side of the cooler. It will have its own temperature controller which will power two fans (one push, one pull) and baffles to exchange cold air as necessary to maintain whatever my target fermentation temperature is.
I will update this post as I make progress but it will be a little slow going as I am pretty busy with work right now. I also plan on detailing the entire process on my website www.johnbeere.com when I get it setup as there is very limited information on this type project on the net - but from the info I've found (mainly on this forum), I am confident in the results.
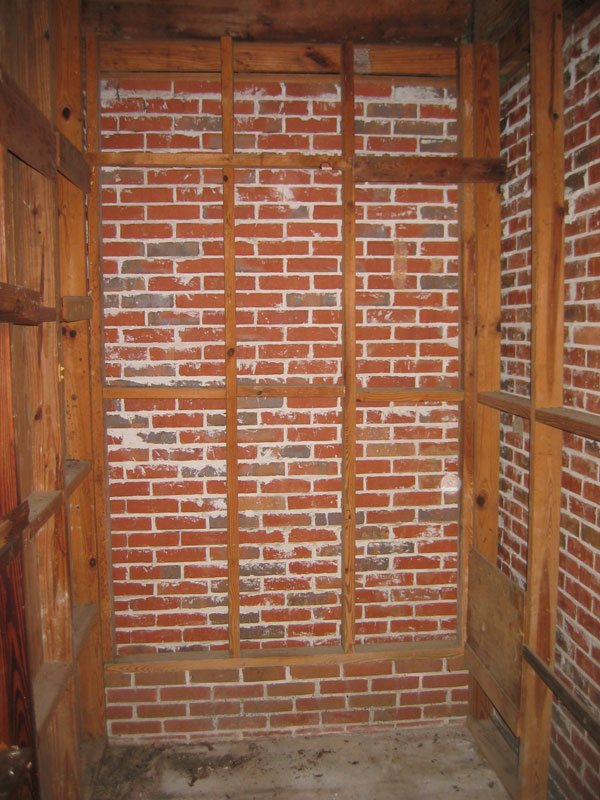
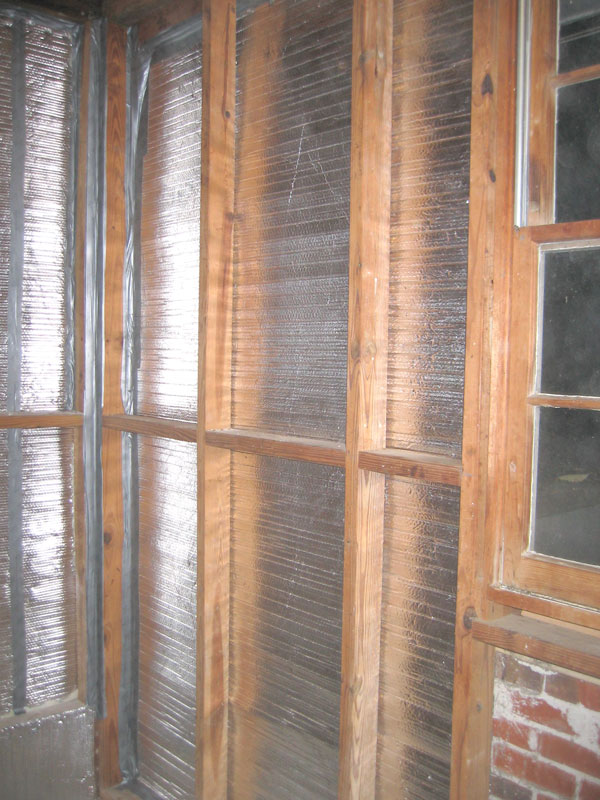
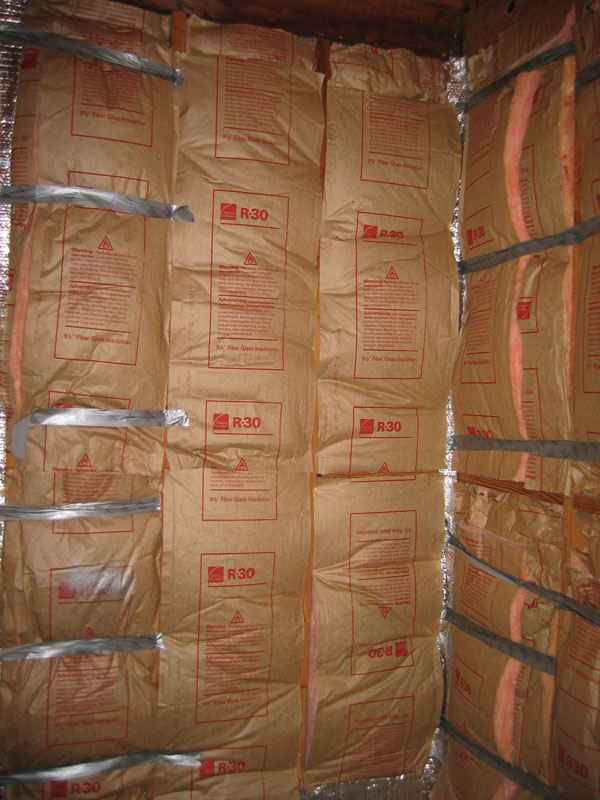
I made some progress today... bought 5 rolls of Reflectix 24" wide foil insulation at Lowes and got it installed on the two brick walls. I was able to put it between the brick and the joists due the to way the room was originally constructed. They recommend airspace of at least 1/2"... I don't think I ended up with that much overall but there is some airspace due to the crap mortaring on the inside of the wall. I'm going to end up pushing it closer to the wall when I lay the insulation as that R30 stuff is thick stuff... still better than nothing right? I also used expanding foam and duct tape to begin closing all the gaps... gotta go get more tape tomorrow.
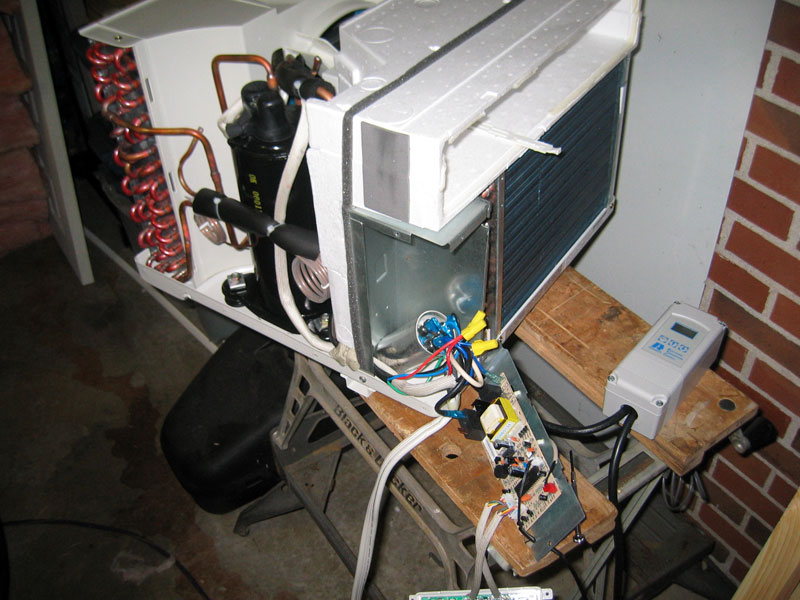
Update on the AC: I test wired a new Ranco controller into the AC this evening. This was the step I was most worried about and, now that its done, I can't believe how easy it was... I was able to completely bypass the built-in controls on the first try. I will officially re-wire it tomorrow. The diagram at http://franklinbrew.org/members/sj/walkin.html is correct, even for my brand new AC.
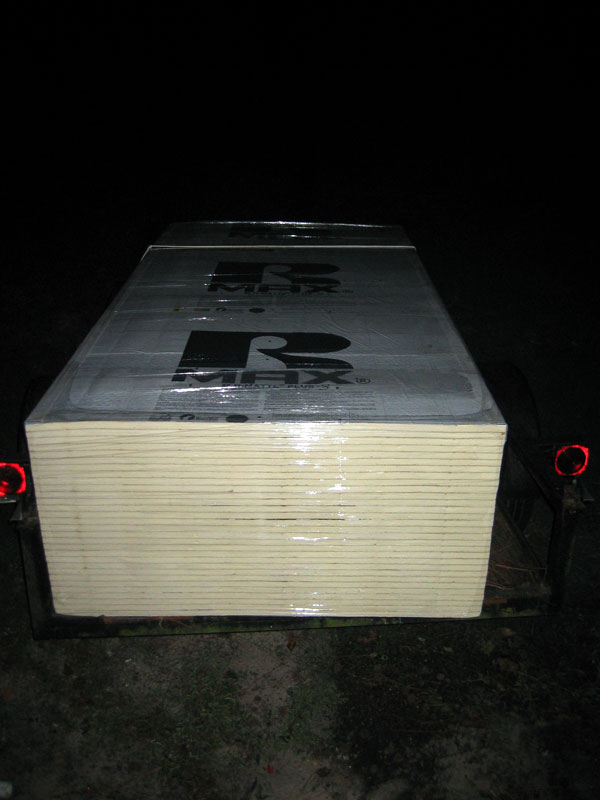
Lowes didn't have but about 10 sheets of that Dow board so I bought a pallet of another called R-Max. Its 3/4" thick with an R value of R5. I plan on lining the walls 3 sheets thick.
Made some progress today... I totally re-wired the AC to completely remove the built-in controls as well as got it working off of only one plug. The diagram I linked to last night shows the need for a second plug and is what I tried last night. The only reason the ground is clipped is I cut it last night during my test.
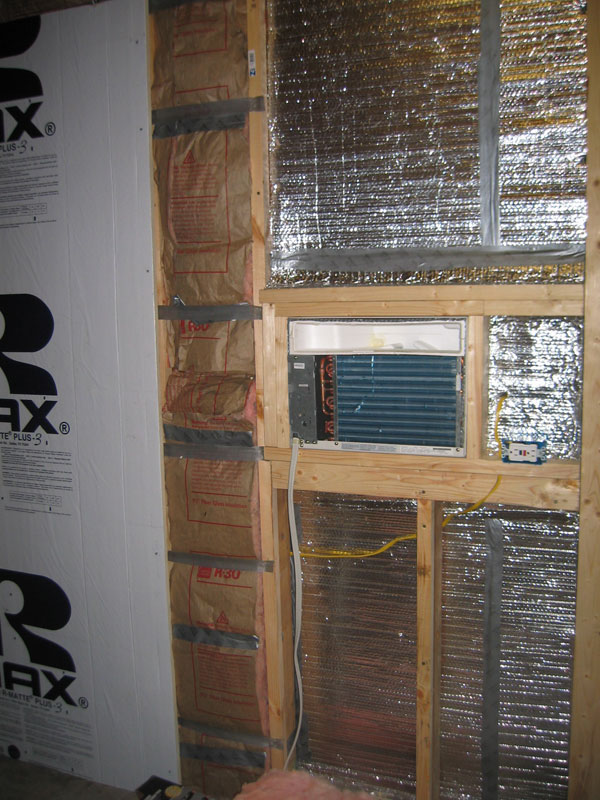
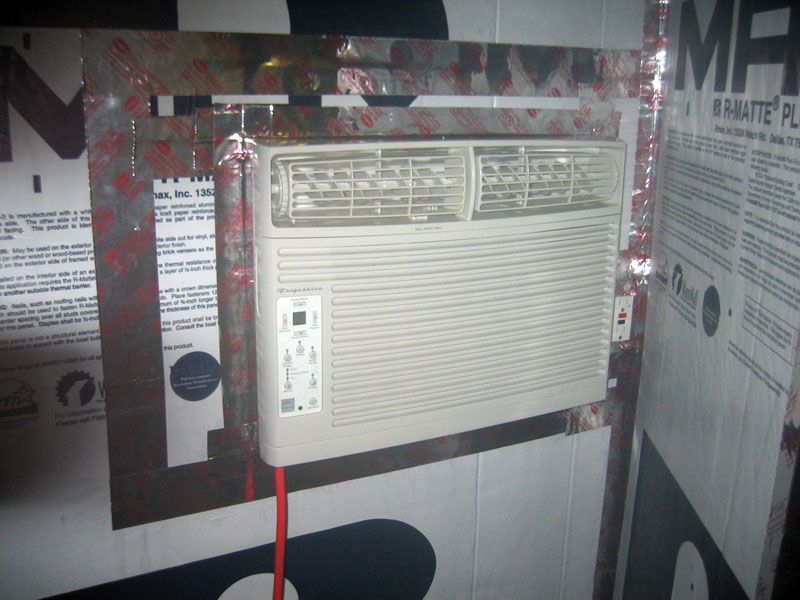
After that, I framed out and installed the AC in the window, plugged up all the holes with great stuff, and lined it with Reflectix like the rest of the walls. I then wired up a new breaker in my breaker box, ran it under the house (absolutely horrible place), out the back of the house through 1" conduit, into the garage, and wired up four new plugs in the garage (only one in the cooler itself - been needing better power out there for some time). And finally, I put a couple of pieces of the foam board on the walls just to see how it was going to work. Turns out there is just no way I can compress the insulation behind the foam board all the way down to the 2x2 etensions I added. So I pushed the board as square as I could and nailed into place leaving about another 1.5" gap. The insulation is pretty much taking up all that room but the back of the foam board is lined in foil and it says dead spaces is OK.
Made some progress today but also took a step back. I hadn't put the front of the AC back on and something fell into the fan while testing - shattering it into a million pieces. Damnit. I have no idea what it was as there is no way I was putting stuff in there. I'll find out when I take it all back apart...
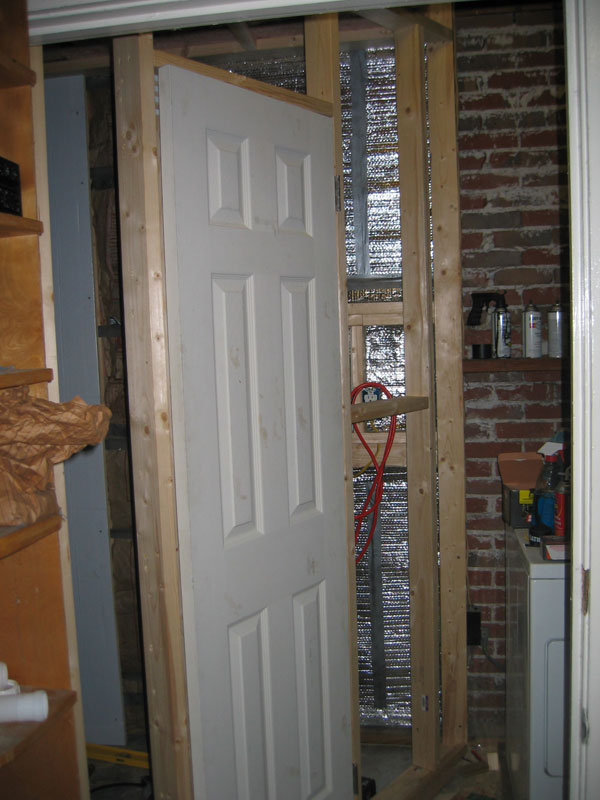
I framed out the final wall and installed the door. The perspective in this first photo is a little hard to follow. It was taken from outside the utility room looking through the door. The wall for the cooler is on about a 30 degree angle.
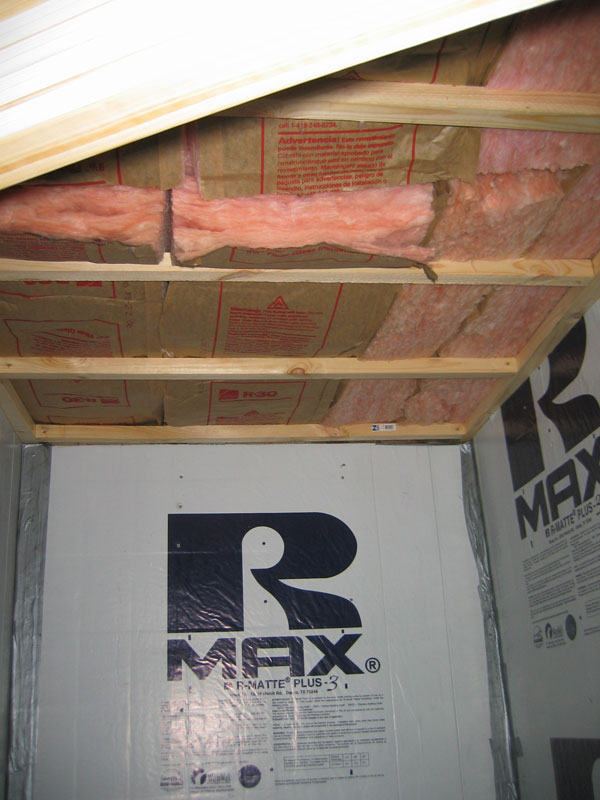
And finally, the ceiling after insulation. Once the walls are fully lined with foam board, I will line the ceiling from the inside with it as well.
I haven't had much time to work on the cooler this week but have made some progress. I was hoping by this point to be able to cool the area while I worked but no such luck since I shattered the AC's fan blade. Hopefully the replacement will be here this weekend. Anyhow, I have all the framing done as well as the wall insulation wrapped up. Now its down to installing all the foam board.
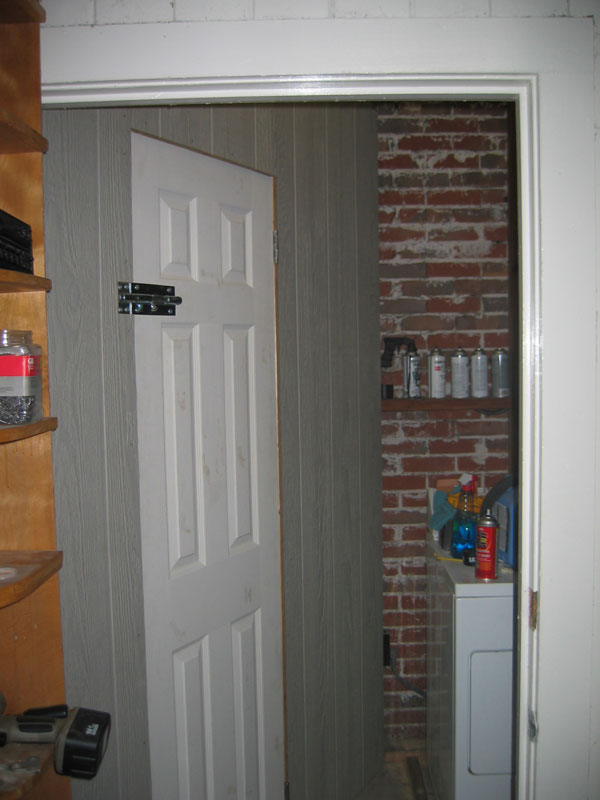
Here is a photo of the cooler looking into the utility room. We'll put some trim around it to finish it off once everything else is complete. I'm hoping to make serious progress by this weekend and be ready to finish it up as soon as the replacement fan arrives.
Got all the walls finished today. Now it is down to the ceiling, floor, and the door... should go pretty quick over the next few evenings. Still debating what wallboard to use to finish off the inside but will have that settled in the next few days. What I really want is $30 a sheet... and I need eight sheets - whew. Regardless of the wallboard, I am in hopes to start testing later this week.
Got the ceiling finished. Its lined with three layers of foam insulation. On top of the ceiling was exactly enough room to pack the R30 insulation on its side - six pieces across. No photos as its really more the same at this point. Plan on doing the floor tomorrow night... I tested it down to 60 degrees for about 30 minutes. I didn't pay that close of attention but the temperature dropped from 84 to 60 within 10~15 minutes and the AC never came back on until after I opened the door. Can't wait to test it once the floor and door are fully insulated.
Got the floor finished up tonight... ended up laying six layers of the foam insulation. Pretty much came out flush with the bottom of the doorway. Scroll back to post #75 for the before shot of the floor and doorjam to get a feel for how thick it turned out to be. Here is a photo of the floor now:
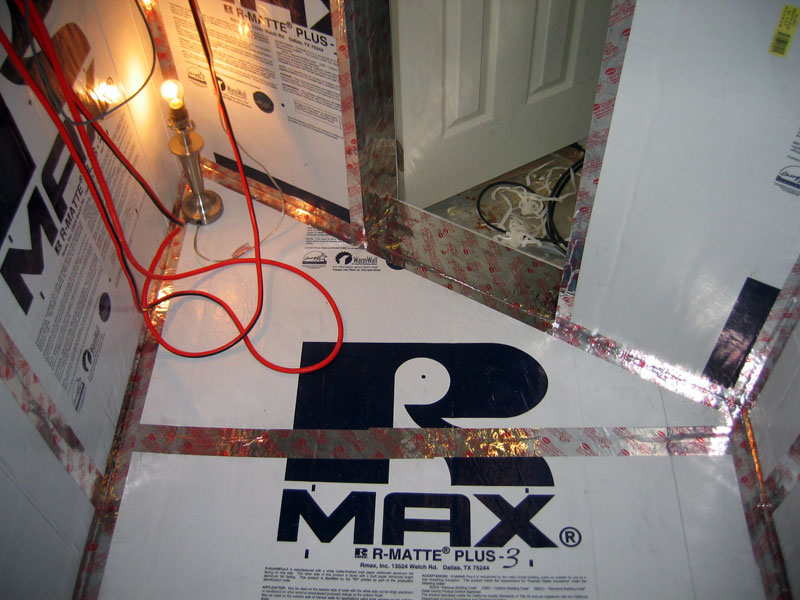
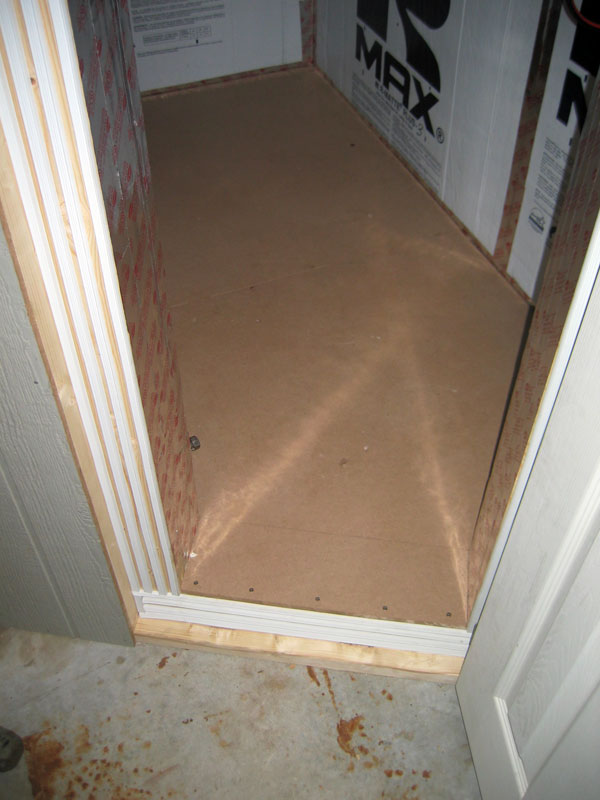
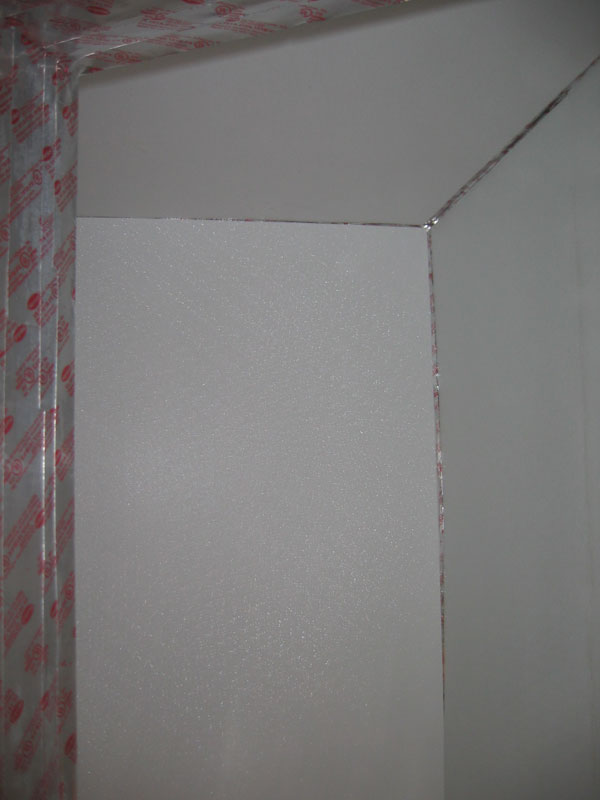
After a few days away from the project, I'm back on it. I put 1/2" MDF on the floor and started placing the wall board. The plastic wall board I chose is EXPENSIVE at $30 a sheet (I needed 7 sheets) but it is going to look really good once finished.
Here is a photo of the floor. A layer of the plastic wall board will go on top of this to finish it off.
